Are you looking for the best local floor tilers near you? You’re in the right place.
Post a job and local floor tile fitters will get in touch to provide a quote for your floor tiling project.
Floor tiling is a great option for areas exposed to water, like bathrooms, toilets, kitchens and utility rooms, as well as high-traffic areas like porches and hallways.
Contents
What is the process of floor tiling?
When looking for a local floor tiler, it’s helpful to understand the basics of floor tiling. Let’s look at the key steps floor tiler installers follow.
1. Subfloor surface preparation
Depending on the type of floor you’re laying tiles on, there are different aspects to consider.

If your floor is concrete or screed, it is usually already very sturdy and has no movement. Freshly laid concrete or screed should be fully dry before floor tiling.
If it is old or already tiled, then old floor tiles need removing, and old adhesive scraped off.
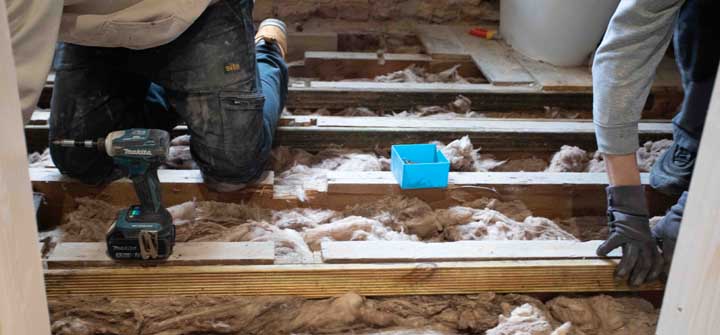
If you’re tiling over floorboards, your floor tiler will secure all floorboards adequately and ensure there is minimal movement. Your floor tile fitter will typically install an overboard on top of the floorboards.
Plywood and chipboard used to be popular overboards. But they are susceptible to moisture damage. As such, nowadays, floor tilers tend to favour purpose made backer boards that are suitable for tiling.
The reason for the overboard is that it creates a very stable substrate to lay floor tiles on. If you were to lay floor tiles directly onto floorboards, your floor tiles and grout are likely to crack over time as floorboards are prone to subtle movements.
The subfloor should be dry and free of any debris.
2. Floor levelling
Often, a floor is not flat and level enough to tile on. If this is the case your floor tiler will use a levelling compound to smooth out any slight dips, to make the floor sufficiently level to tile on.
Failure to do this can result in cracked tiles over time since the pressure from foot traffic is overly concentrated on certain parts of the floor tiles.
If the floor is adequately levelled beforehand and free from movement, the substrate will be sturdy, and the pressure from foot traffic will be evenly spread.
3. Tile layout and planning
Next, tilers will plan the floor tile layout, this is called setting out.
When tiling a floor, the general rule of thumb is to lay tiles from the centre of the floor and work out towards the walls.
They may dry lay the floor tiles from the centre in four directions to each wall to gauge how they will fall when they meet the wall. If only a thin piece of tile is left where the floor meets the wall, the centre point is moved slightly.
Laying small slithers of floor tiles at the wall is tricky and unsightly, so it should be avoided where possible. Rooms are not usually exactly square, which is why setting out is important.
4. Adhesive for floor tiling
Floor tile installers will use an appropriate adhesive, which will depend on the type of floor tile (ceramic, porcelain, etc), the floor substrate and the amount of moisture it will be exposed to.
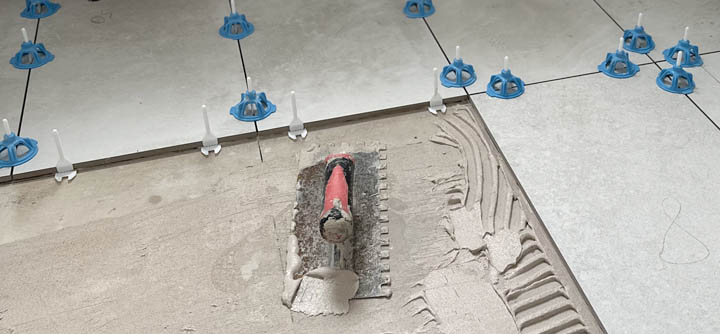
The floor tile adhesive is mixed with water until smooth. Then, the adhesive is applied to the floor, and a notched trowel is used to create channels, which helps to spread the adhesive evenly and create a texture with more grip.

Large format floor tiles may need ‘buttering’ before laying. Buttering is the process of applying a thin layer of adhesive to the underside of the floor tile before laying.
5. Setting floor tiles
Each tile is laid firmly onto the adhesive. This process is repeated using spacers between each floor tile to maintain consistent gaps.
Periodically, the alignment and level of the floor tiles is checked to ensure a uniform floor.
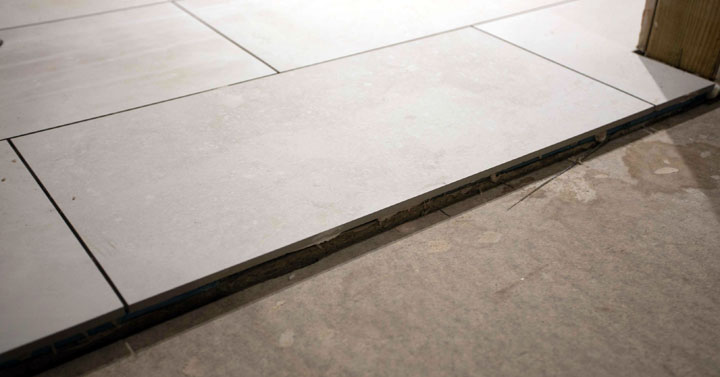
When laying the tiles at the edge of the floor, they are cut appropriately to fit the remaining gap.
Once complete, the floor tiles should not be walked on until the adhesive has set. Usually, this is around 24 hours but it does vary depending on the adhesive used.
6. Grouting floor tiles
After the adhesive sets, the floor tiles are grouted.
Grout is mixed according to the manufacturer’s instructions. The gaps between the tiles are filled with grout using a rubber float. Excess grout is wiped off with a damp sponge before it dries.
7. Finishing
Using a damp sponge, any remaining grout haze is cleaned from the floor tiles. Now the floor tiling is complete, the last step is to fit a suitable threshold.

A threshold bridges the transition between your floor tiles and the floor on any joining room (such as carpet or laminate flooring).
Free Service
What are the pros and cons of different types of floor tiles?
Above, we covered the general process of floor tile installation. But what about the tiles themselves? Let’s go through the main options available, some pros and cons and a few other tips that may be helpful.
| Tile material | Pros | Cons |
| Ceramic | Affordable. Wide variety of designs and colours. Easy to clean and maintain. Resistant to water and stains. |
Not as durable as porcelain. Can chip or crack under heavy impact. |
| Porcelain | Highly durable and dense. Water-resistant. Suitable for high-traffic areas. Low maintenance. |
More expensive than ceramic. Harder to cut and install. |
| Glass | Stylish and modern appearance. Reflects light, making spaces appear larger. Resistant to stains and moisture. |
Can be fragile and prone to breakage. Challenging to install. Limited to specific applications. |
| Marble | Luxurious and timeless appearance. Unique veining patterns. Suitable for both formal and informal spaces. |
Expensive. Requires regular sealing to prevent staining. Susceptible to scratching and etching from acidic substances. |
| Granite | Extremely durable and hard. Resistant to scratches and heat. Low maintenance. |
Expensive. Limited colour options. Heavy and may require additional structural support. |
| Limestone | Elegant appearance. Soft and warm underfoot. |
Porous and prone to staining. Requires regular sealing. Not as durable as granite or porcelain. |
| Travertine | Unique and natural appearance. Suitable for both indoor and outdoor use. |
Porous and susceptible to stains. Requires regular sealing. Softer and more prone to scratching than granite. |
| Slate | Natural, rustic appearance. Durable and resistant to stains. Slip-resistant surface. |
Uneven surface. Requires sealing. Limited colour options. |
| Natural stone | Unique and varied appearance. Durable and can add value to a home. |
Requires sealing and maintenance. Limited availability of certain types. |
| Natural Clay | Warm and rustic appearance. Eco-friendly. Durable. |
May be prone to cracking. Limited colour options. |
| Quartz | Non-porous and resistant to stains. Durable and low maintenance. Wide range of colours and patterns. |
Can be more expensive than other options. Not as heat-resistant as some natural stones. |
| Get quotes | ||
Tip: Ensure the floor tiles you buy are from the same batch because the colour can differ slightly from batch to batch.
Free Service
Floor tiling FAQ’s
Perhaps you searched online for ‘floor tilers near me’, but before you continue your search (which we can help you with), here are the most common questions homeowners ask when planning or having their floor tiled.
How long before I can walk on floor tiles?
Ideally, you should wait at least 24 hours before walking on newly laid floor tiles. This is because the tile adhesive takes a little time to set properly. Take the floor tile fitters advice or the adhesive manufacturer’s instructions, as adhesive curing times can vary.
Walking on your tiles too soon could cause them to become misaligned, debonded or even crack.
Should I use white grout for floor tiles?
White grout on your floor tiling may look amazing when first installed. But the problem comes quickly of it looking dirty due to natural foot traffic. It is incredibly difficult to keep white grout looking white on a floor.
More common and easier to maintain floor grout colours are those in the mid-grey range.
How long does it take to tile a floor?
Generally speaking, including grouting:
- Tiling a small floor takes: 1-2 days
- Tiling a medium floor takes: 2-3 days
- Tiling a large floor takes: 3-4 days
It takes less than half a day to grout a small floor, half a day for a medium floor and a whole day to grout a very large floor.
This is assuming the floor itself doesn’t require much preparation, is in a suitable condition and is relatively level.
It could take longer if your project is particularly complex, for example, a non-standard pattern or uses small tiles like mosaics.
Less experienced floor tile fitters may take a bit longer.
What is slip resistance on floor tiles?
Slip resistance measures how easy it is to slip over when walking on a tile. Usually, floor tiles have a higher slip resistance than wall tiles. The reason for this is fairly obvious, to reduce the likelihood of slipping over on them!
You should check a tile’s slip resistance, particularly if tiling wet areas like shower or bathroom floors. Naturally, it is preferable to have a higher slip resistance in such areas.
Can I use wall tiles on the floor?
Only use tiles that state they are suitable for floor tiling. If you visit a tile shop near you, you’ll see on the labels they state what they are suitable for.
Some tiles are only suitable for wall tiling, others are only suitable for floor tiling. Whilst some are suitable for both.
Never tile a floor with tiles that state they are only suitable for wall tiling. There are two main reasons for this:
- They will likely be thinner and, therefore, not suitable for walking on. As such, they’ll be prone to cracking or breaking.
- Depending on their design, they may have a very low slip resistance, which is ok for walls but unsafe for tiling a floor.
One method tile manufacturers use to test and rate their tiles with is the pendulum test in accordance with British Standard 7976 which rates the slip resistance of flooring.
Do I need planning permission to tile a floor?
You do not need planning permission to tile a floor.
Are there any building regulations to consider for floor tiling?
No. There are no building regulations with regard to floor tiling.
Can a floor tiler install underfloor heating?
Tilers do not install underfloor heating.
Either a plumber or an electrician installs underfloor heating before tiling the floor, depending on the type of underfloor heating.
There are two types of underfloor heating:
- Wet underfloor heating: uses pipes with water that runs through them, just like a radiator.
- Dry underfloor heating: contains heated electrical wires.
Both types are suitable to tile over.
If you plan on installing underfloor heating, it will make the floor tiling process slightly more complicated and may take a little longer. Still, it’s insignificant overall, and a good floor tiler will know how to work over your underfloor heating system without damaging it.
Hopefully, the above information has given you a good introduction to floor tiling so you can understand the process and some of the options available.
Now, perhaps you’re thinking ‘I need to find floor tilers near me’ to start my project?
So if you’re ready to get started, post a job to get quotes from floor tilers near you.
Free Service
About our data
We survey home owners about their floor tiling projects, and tilers about how they work. We use this information to help create our tiling guides.
Author
Written by, Adam Clark, trade specialist at My Local Toolbox.